Pull up bar designs
Eighteen pull up bar designs across eight generations: rack bars, nunchucks, pegboards, push-pull rigs, hanging bars, freestanding frames, and the helix bar that replicates them all.
How many pull up bars does your gym have? How about squat racks? How about stands or boxes to do push ups on? Maybe stands for learning to do rows?
Most gyms are simply not designed to be used by more than two people at once to learn to do push ups, squats, dips, hang, pull ups or learn to move. There’s almost always a queue for the dip stand, squat racks or pull up bar. There’s one squat rack, one dip stand, one pulley stack with a pull up bar. If you’re truly lucky there may be a monkey bar-ish setup — with all bars placed at a single height with the same diameter bars.
This setup or layout of a gym is hostile to users. Worse yet, it is unwelcoming and discourages users from picking up new skills. I’d argue the worst offenders are architects and gym equipment providers who supply these absolutely banal layouts and designs to gym owners who rarely map out the programs they run or how their gyms could actually be used.
I could brag about our 14 different hanging implements with 4 different thicknesses to accommodate different hand sizes. I could talk about our setup that moves a bar in 2 inch increments to make it easy to progress on a push up. Or our 3 dip stands that ensure no one is ever waiting, even with an EMOM clock. And there’s 10 stations to squat on with 8 barbells, 2 Swiss bars and a safety squat bar. If someone can’t squat with a barbell, give them a couple of options — like our ladder, pitchfork and t-bells do. Maybe I am bragging a little.
But I have a different point. Gyms really need to think about how to get more people moving in useful ways. And figure out layouts that nudge the users to move. It should reduce the friction to learning new skills and getting stronger. As things stand, gyms accommodate very, very few people. And that’s a shame.
What follows is the story of how our pull up bars evolved — eighteen distinct designs across eight generations, each built to remove one more point of friction.
Part 1: Wall mounted bars
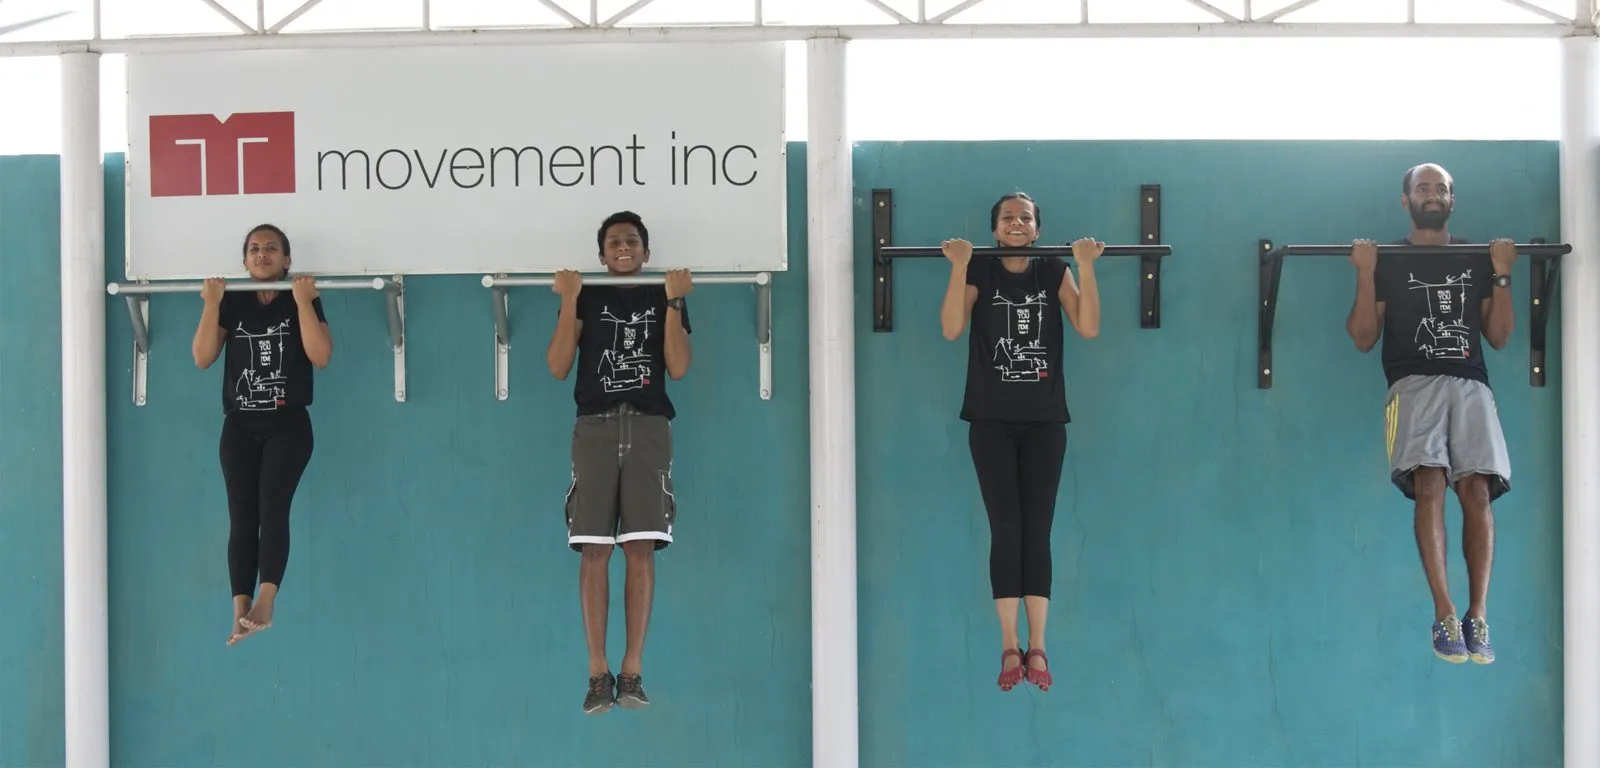
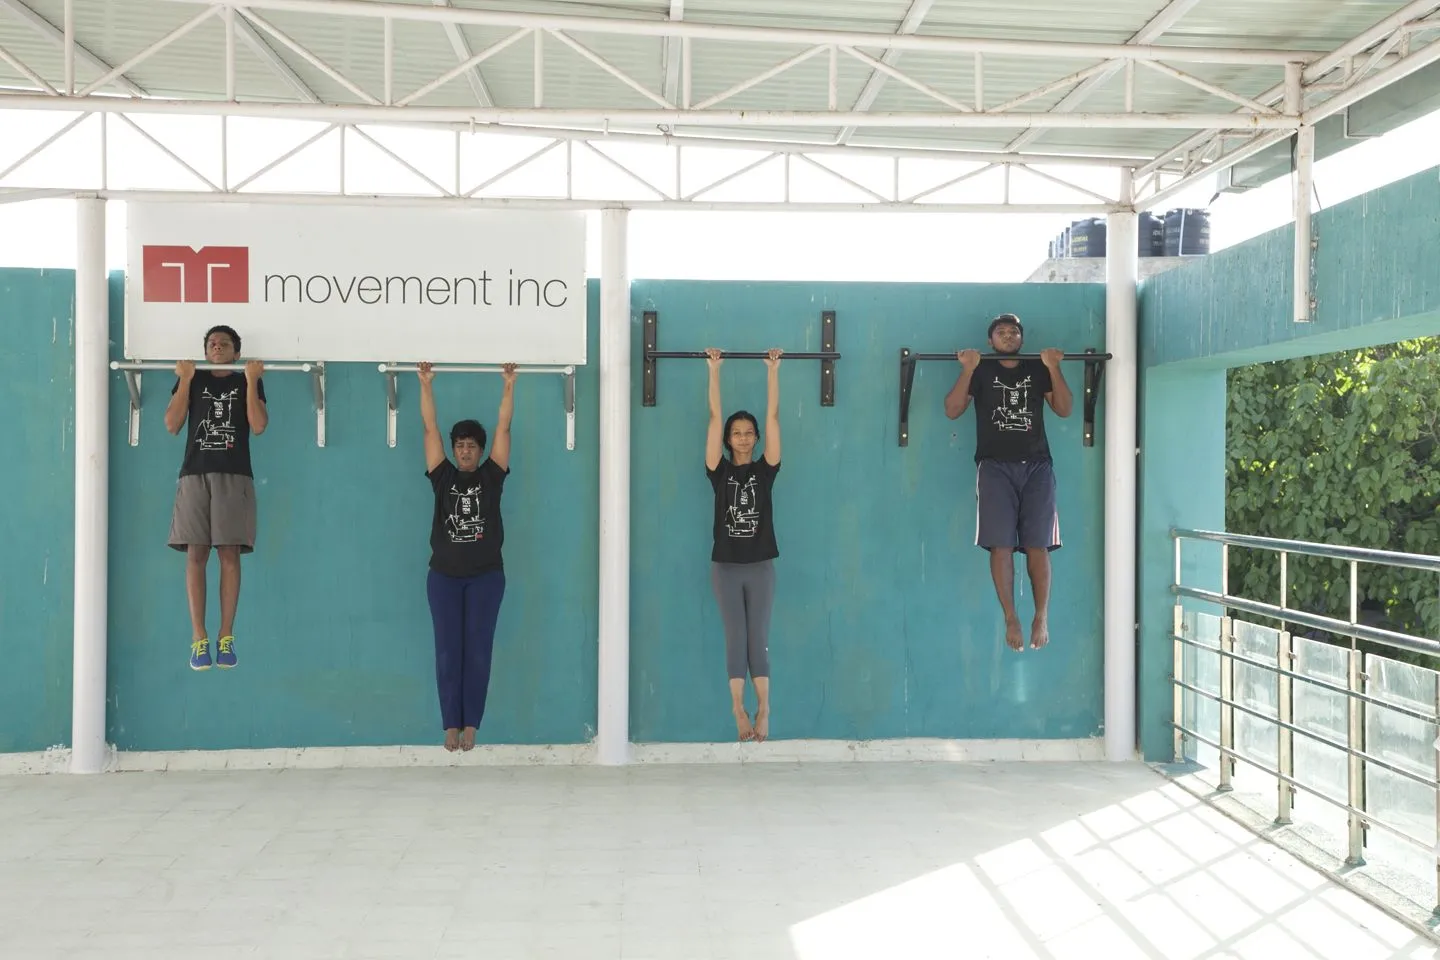
Our first pull up bars were simple wall mounted ones. Straight bars on frames, screwed into the wall at staggered heights — so people of different sizes could each find a bar that fit them. They hung under the gym’s sign, and for years they were where clients did their first hangs, their first rows, and eventually their first pull ups.
Part 2: Rack bars and the pull up ladder
Our second pull up bar started off as a squat rig with 3-4 stations to squat in and seven stations to do chin ups or pull ups on. This was to replace our wall mounted pull up bars. We removed those to clear up space close to walls for pulleys and other implements that would occupy less space when placed against the wall.
We started with a rig. The rig was straightforward. But within 18 months, we had outgrown it. So I reworked our rigs into 3 independent squat racks with 3 pull up bars and 6 stations to squat, lift or bench in. We added one more in 2019.
The three pull up bars were 28 mm in diameter and unknurled. They were comfortable. This was complemented by a pull up ladder. We needed more stations for hanging on, we were beginning to use the neutral grip option more often, and more people were spending time working on pull ups, doing hangs and enjoying monkeying around. The only thing I was particular about was the 20 inch gap between two rungs or pipes. This would allow for conventional straight bar use, and you could hold two adjacent pipes to work a neutral grip too.
This combination served us well for 5 years starting in 2017. We didn’t really do anything novel design wise. We could attach rings to the pull up ladder for inverted rows. And alongside these setups, we have always hung rings to use for pull ups and inverted rows since the gym started.
Over the next few years, as the gym grew, we saw more folks working towards pull ups and saw a need for a more nuanced progression tool for push ups. We also saw the need for varying the grip width, thickness and angle at which people held the bar. What followed were two iterations of the push-pull rig, hanging pull up bars, nunchuk handles, freestanding pull up bars and the adjustable camber pull up fixture — covered below.
Part 3: Nunchucks and pegboards
We made our first set of nunchucks in 2021. I first ran into them on Iron Mind and Rogue’s websites. I didn’t think much of it.
But enter elbow tendinitis. Any effort to increase load or volume would irritate my left elbow. One arm pull up progressions were out of the question. Neither rings nor neutral grips solved the issue. After reading Chris Beardsley’s posts on neuromuscular matching, I figured let’s alter the variable of how I am holding the bar. This changes the muscles engaged and the degree of recruitment during a pull up.
I made one nunchuck grip and got to work. Progress was painful. Not because of the elbow — that was fine. The knurl was too dull. I had to hold on for dear life to get the pull ups done. And I made slow, pain-free progress. I have no simple explanation for why it worked, other than knowing that changing a variable such as equipment, volume, exercise or frequency has almost always helped me work around training constraints.
I’ve made 14 sets of nunchucks since. Including a revolving pair that I decommissioned since it was a pinching hazard. There’s also a fixed width pair that forces you to do a stricter pull up. One pair, with the original dull knurl, hangs at home. I gifted one to a friend. 11 others hang at the gym. The grip thickness starts at 28 mm and goes all the way through 50 mm — 32, 35, 40, 48 mm. We have them all.
We play a game by having clients do 2 reps on each pair for as many rounds as possible in 12 minutes. I’ve racked up 44 reps in 10 minutes. Most importantly, it’s just a fun new tool to learn to use. And that’s something humans enjoy doing, in my experience.
Which is why I built a pegboard in 2018. I removed it since it was a little too challenging and resulted in odd aches and pains. But it was a nice setup for neutral grip chin ups — you could adjust the width incrementally to involve more of the upper back and less of the arms. Unlike the nunchucks, the pegboards currently lie unused. I hope to hang them on the wall soon. I hate seeing unused equipment.
Part 4: The first push-pull rig
Our first iteration of the push-pull rig was one of the early examples of us constructing a gadget to serve a specific coaching need. We wanted to provide the smoothest possible push up progression. That meant allowing clients to progress in 2-3 inch increments from 30 inches through to the floor. So we welded pegs on a pair of steel pipes to provide a hook for a rod that clients could set at different heights.
This gave us a terrific amount of versatility. First off, it took people out of our squat racks and off the plyoboxes into the push-pull cube to work on their pull ups and push ups. This compartmentalisation is important for better use of floor space. The rig also served as a great anchor point for ropes and inverted row rings. The pegs were set at very considered heights to ensure clients could use them for a variety of use cases, including eccentric or assisted pull ups.
There was a screw up though. My original idea was to drill the peg into the pipe and weld it in place. But I let my then-welder convince me it would be fine to just weld it directly on the frame. It was a bad idea. After 3 years of use, the pegs started popping off — the weld weakened for many reasons, including use. And what I thought was a compact design also had the constraint of occupying too much space for too “little” use when we rejigged the gym’s floor plan in 2024.
But I fixed these issues and improved on a few design elements with the next iteration.
Part 5: Take 2 of the push-pull rig
Our second iteration of the push-pull rig was one of our biggest leaps in terms of building something to reflect our coaching and our capacity to make more complicated gadgets.
First up, we made it longer and narrower. This made the unit a better fit in the middle of the gym. We also improved on the capacity to adjust the height at which one could operate: a lock could slide in 2 inch increments and be secured in place using 19 mm pins. And we made pipes and rods between 27 mm and 38 mm in thickness, giving folks with a variety of hand sizes plenty of options.
One of our other cool inventions for this unit was the X or spider pull up bar. Unlike a straight bar or parallel bar, this unit allows you to set up with your hands in an externally rotated position. This has been a game changer for some clients with dodgy shoulders. In addition, we created the infinite monkey bar, which gives clients a chance to work on their grip and shoulder stability too.
We beefed up the locking units and made the bars fit in place much more robustly. Milling 2 inch holes along the pipe length meant the bar could be set in place for inverted rows, push ups, pull ups, assisted pull ups, muscle ups, muscle up regressions, one arm push ups, hip thrusts and single leg squats, among other moves.
And the design is distinct and one-of-a-kind in a good way. It is a versatile piece that allows people to work together while giving each other enough room, with every station having 4 feet of width. Unique add-ons like the 27 mm pull up bar set at a height of 80 inches make it much more accessible for women to work on their pull ups. And the spider bar is one of those bits of kit that is better experienced than explained — it really makes it more comfortable to learn to do a pull up.
It is one of those gadgets where the whole is so much greater than the sum of its parts.
Part 6: The hanging bars of Seaward Road
In addition to our push-pull rig (10 spots for pull ups), there are 5 spots for pull ups on our squat racks, plus five sets of rings positioned throughout the gym. The missing link were neutral grip bars.
With a neutral grip, the bars run parallel to each other — if a straight bar sees you hold the bar with palms facing away or towards you, with a neutral grip the palms face each other. Some folks find this position more comfortable on the shoulders, and it helps recruit the upper back more easily.
So we made three sets of frames. One with neutral grips fixed on two laser cut cambered frames. Two with neutral grips that could slide together or apart — you can move the handles apart or together, providing both narrow and wide grip options for neutral grip pull ups. We achieve this by welding handles on a square tube that slides along a pair of pipes running parallel to each other. One of the setups is two frames with space between them, for literal headroom.
Our spider/X bar was also a big hit — clients love it! So we made two more setups that could hang from the ceiling: one with the pipe bent at 90 degrees, another with a 110 degree bend. These subtle changes provide different starting positions for the shoulders and scapula to begin to flex, retract and glide their way through the pull up or chin up.
And as a final wild card, we have a straight bar with two nunchuk handles attached on either side. This gives you a challenging grip position to do pull ups with. You can use it as a regular pull up bar too. And it acts as a rung for people brachiating their way through the push-pull rig.
Part 7: Freestanding pull up bars
These bars exist for 2 reasons in the world: painful landlords (they don’t want you drilling holes in their walls) and sub-standard Indian construction (walls that can’t bear the load of a pull up bar).
Freestanding pull up bars are neither versatile nor compact. They occupy a lot of floor space. And they’re usually good for two or three moves: pull ups, muscle ups, hanging leg raises, shoulder mobility work and maybe dips. A good pull up bar sees a bar that is 28-32 mm thick. You can hang rings off it too. They are tall to facilitate pull ups — usually between 90 and 108 inches. And for it to not topple or tip, the frame on the floor needs to be 5-7 feet long, and usually 3 to 4 feet wide.
But I love them. It’s irrational how much I like freestanding pull up bars. I’ve toyed around with a lot of weird ideas with them. First, I bent an entire 20 foot long pipe into a single U shaped pull up bar, and made a frame that I could insert this into. This frame also houses an adjustable pull up bar, and I attach my ladder squat unit to it — a culmination of 3-4 ideas. But most freestanding pull up bars are much simpler: a frame on the floor, two vertical arms flowing out of the frame, and a bar connecting them.
I have also welded a frame with the exact width to accommodate nunchuk pull ups when you use the vertical members of the frame. You can see this in the video. I donated one of these to my daughter’s school (the red one in the video). Kids regularly move the one in their school around based on where the sun is. And as with everything we build, it takes a licking outdoors but holds up well.
I made all the frames light enough that a single person could carry one around and move it to different places. That is the single biggest selling point of this bar: it is portable. The latest unit isn’t light, but it can be dismantled within 10 minutes and moved around quickly.
It’s just my love for pull ups and different types of pull ups that has fuelled my enthusiasm to make these bars. I’ve made four of them for clients, each one factoring for their height and use case. As things stand we don’t have freestanding pull up bars in our gym — they take up too much space for what they do. I have one at my mom’s place and one in my personal training space.
I imagine at some point I would like to run a portable, travelling gym. It would feature several foldable, freestanding pull up bars with lever squat or press units that could attach to them.
Part 8: The adjustable pull up bar
By this point you’ve seen seven parts covering 18 distinct designs for pull up bars: fixed straight bars mounted or welded on a wall or column; straight bars on a squat rack, Swiss bars mounted on a squat rack, and bars running parallel to each other on the pull up ladder; nunchuk handles and pegboards; monkey bars; freestanding pull up bars; push-pull rigs; and hanging neutral grip and cambered bars.
The logical conclusion was to have one device that could replicate all the positions and setups the above options could. And our helix pull up bar is that device.
Think of it as two moving parts. A handle that you hold, which can swivel and lock into positions ranging from parallel all the way through a regular pull up bar — 90 degrees, 100 degrees or 110 degrees. This creates multiple starting positions for the wrist and shoulder. It can be a game changer for folks with dodgy shoulders. The second moving part is the capacity to adjust how far apart the bars are positioned.
This creates close to 36 distinct positions (72 by reversing grip). That’s just hyperbole — realistically, you could create 14-15 positions that feel distinct and interesting. In the video you can see me toying around with an extra wide, externally rotated position, and more conventional positions too. The handles can be swapped out for something thinner or thicker if you prefer. The height of the pull up bar can also be adjusted in 2 inch increments to accommodate a variety of heights.
The downside of this unit is straightforward. You need to climb up on a tall stool to switch settings. It is not quick to move the handles apart and lock them — the pin has to be removed and locked in to rotate the helix. But it is robust and works well, and I will trade that convenience for the ease with which I can swap out parts or clean the unit for maintenance.
Prior to making this unit, I did make a fixed angle pull up bar — you can see that in the video too. I am making a second helix unit for the gym as we speak.
Curious about how we build these? See the equipment page for full build breakdowns of the helix bar, the push up and pull up rig, the infinite monkey bar and more.